|

|

|
|||||||
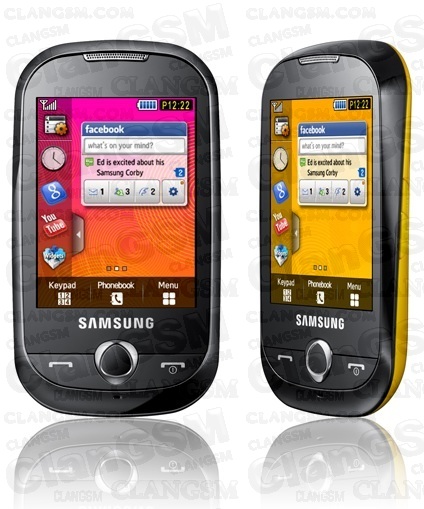
| Other recent Samsung smartphones Other recent Samsung smartphones (last 3 or 4 years) |
 |
|
|
Tools

|
|
# 1
 12/04/19, 09:03:16
|
||||
|
||||
 Installing custom FW S3650XEIJ2, patches and themes on Samsung Corby GT-3650 (ultimate guide)
Today I bring you a retro guide of the Samsung Corby GT-3650 launched at the end of 2009 internationally.
 The content of this tutorial has been obtained from Russian, Indian, Brazilian pages and from my own experience over the days I have been researching and putting into practice everything detailed here. Let's start with the necessary files: Samsung New PC Studio MultiLoader 5.56 S3650XEIJ2.7z (official FW) Files to create custom FW: Samsung Corby Jelly Bean 4.1 by Sarai_001.zip In this ZIP you will find the following files: Res (a folder) Amss_patch.bin jellybean4.1.rc2 Basically, those are all the files we need at the beginning. Now I will explain a little about what each one is for. Samsung New PC Studio : official Samsung program that will help us make backup copies of our files (contacts, calendar, etc.). To copy multimedia, it is better to connect the mobile as mass storage. I recommend using the official cable, other ones that were not from Samsung did not work for me. MultiLoader : unofficial program that will allow us to install the official FW and the files to modify it and turn it into a custom one. That is, with this program we will install everything. S3650XEIJ2.7z : Official FW. It is the FW that the community worked on to make it compatible with modifications, DO NOT install another one. res (folder): contains all the images, gadgets and various types of visual media. This folder is copied to the root of the phone and more images, sounds, gadgets, etc. can be added to it whenever we want. Amss_patch.bin : this is the main file, it manages to modify and adapt the system to make it compatible with modifications. On the Internet it can be found with various names, but always in BIN format. These are some of its other names: Apps_patch.bin, Amms.Patch.Android.4.0.bin. jellybean4.1.rc2 : it is a compilation of the most important patches to modify the system to our liking. It can also be found on the Internet with other names, for example: AIO.rc2, C.rc2, Patch Android 4.0.rc2. Individual patches are usually in SYS and SMP format. There is a program with which you can compile the patches you want and create an RC2 file. The program is found with this name: QuB_public_v.0.3_001_beta.rar . It is not essential, since we already have the BIN patch (QuB also serves to modify the BIN of the official FW and make it custom) and the compilation of more than 50 patches in a single RC2. We prepare our terminal: Make sure that the mobile has the SIM LOCK set to OFF, otherwise the phone will be useless/dead.. To see this you have to dial the following number: *#7465625# if sim lock off appears, you can continue, otherwise abort the mission of this tutorial. Activate or Deactivate SIM Lock *7465625*28746# Activate SIM lock #7465625*28746# Deactivate SIM lock If you have SIM LOCK set to OFF, we continue: We create a backup of all the data we want to keep. Menu\Settings\Phone\PC Connections: Samsung PC Studio, Save and connect the phone to the computer with Samsung New PC Studio installed to make the corresponding copies. With the Multimedia Player mode we can directly access the phone memory to create a copy of the folders. With the Mass Storage mode we will access the microSD. We extract SIM and microSD. Charge to 50% or more. We check what FW our mobile currently has: we dial the code *#1234* in the phone application. Write down this information in case you ever want to reinstall the same FW. Optional: do a full wipe with the following code: *2767*3855#. It will take a few minutes, if the phone does not restart after turning off, turn it on again. Leave the Samsung PC Studio mode activated on your phone. Put the phone in Download mode by pressing the following combination with the phone off: Volume down + Camera + Hang up  We connect the mobile to our PC. We unzip S3650XEIJ2.7z. We unzip Samsung Corby Jelly Bean 4.1 by Sarai_001.zip. Installing the official FW : We start MultiLoader with Administrator permissions.  We select BRCM2133. We mark Boot Change, Full Download and Master Rom. Only those three. Now I tell you which files to put in each section: Boot : BOOTFILES folder (located in S3650XEIJ2\COMMON\BOOTFILES) Amms : apps_compressed.bin Rsrc1 : Rsrc_S3650_Open_Europe_Slav.rc1 Rsrc2 : Rsrc2_S3650(Low)_CIS.rc2 (located in S3650XEIJ2\EACH COUNTRY\CIS) Factory FS : FactoryFs_S3650_Open_Europe_Slav.ffs (located in S3650XEIJ2\EACH COUNTRY\CIS) In Amss, FOTA, Tune and ETC we do not put anything. Press Port Search several times until a message appears saying "Ready - [S3650]" (if only "Ready" appears, press the button again). Now, very important: check that everything is done correctly before performing the installation. Make sure that all the files are correct and that you have checked all the correct options. There are small boxes next to each section (Boot, Amms, Rsrc1, Rsrc2 and Factory FS), check that they are marked with a tick. Press Download . It will take about five minutes to finish the installation. When the message "All files complete" appears, the installation will be finished. Disconnect the cable and remove the battery from the phone to exit Download mode. Turn on the phone and wait until the system boots up completely. Check what FW your phone currently has: dial the code *#1234* in the phone application. If it says S3650XEIJ2 we will have finished installing the official FW. Custom FW installation : Leave Samsung PC Studio mode activated on your phone. Put your phone in Download mode. Connect your phone to your PC. Start MultiLoader with Administrator permissions. Select BRCM2133. Check Boot Change and Full Download. Only those two. Now I will tell you which files to put in each section: Amms : Amss_patch.bin (found in the ics jelly bean theme folder) Rsrc2 : jellybean4.1.rc2 (found in the ics jelly bean theme folder) Do not put anything in the other sections. Click on Port Search several times until a message appears that says "Ready - [S3650]" (if only "Ready" appears, click the button again). Now, very important: check that everything is done correctly before performing the installation. Make sure all the files are correct and that you have checked all the correct options. There are small boxes next to each section (Boot, Amms, Rsrc1, Rsrc2 and Factory FS), make sure they are marked with a tick. Click Download. It will take about five minutes to finish the installation. When the message "All files complete" appears, the installation is complete. Disconnect the cable and remove the battery from the phone to exit download mode. Turn on the phone and wait until the system boots up completely. How to access the patch menu : Turn off the phone. Press the lock button (above the camera button) and the power button at the same time. When the phone shows the first sign of turning on, release the power button. When the patch menu appears, release the lock button. If the system boots up and the patch menu does not appear, something has been done wrong. Keys in patch mode: camera button: select lock button: save changes center button: turn page (to see more patches) volume up and down: navigate up and down call key: back In order to see the theme change (and thus start to see the advantages of custom FW) we mark the following options. To mark and save the first patch I will show you the button combination: Camera button. Volume up. When we are in "12. change gadget": Camera button. Lock button. We do the same with the following patches: 14. change menu 15. change myfiles The ones on the first page of the patch menu (from 1 to 12) are basic, you can leave them all marked. After saving the changes, press the call button several times to return to "Main Menu". Select "2. Restart" and press the camera button to restart and see the changes. Last edited by Ipho on 04/16/19 at 04:44:35 . 
|
|
|
|
# 2
12/04/19, 15:50:47
|
||||
|
||||
|
Patches and their function
The names and order are not exactly the same, but the names are very similar (sometimes only the order of the words changes, if you are looking for a specific patch, use ctrl+F to search for part of the patch name).
1 - Patch Loader - MasterPatch.Sys - patch.bin : These are indispensable for all the remaining patches because they are the ones that carry them. 2 - Change SWF : includes the following patch in one: Change Menu : Change Corby's menu, the menu should be located in the ... /Res folder. Change Gadget : change bottom bar. Change MyFiles : Change colors and icons of the Cellular folders. Through the MyFiles.swf file which should be in the Res folder 3 - LowBatRestrictOff : removes the access restriction to Java, Internet, Music Player and more... When your phone's battery is running low. 4 - Java - JavaHideSilentPopup, JavaLcdOff, Java on mmc : It is a single patch that includes these 3 Java related patches. JavaOnMMC : Allows installation of Java applications on the memory card. JavaLCDoff : The patch fixes the cell lights in Java. That is, the lights go according to what you have configured on your mobile. JavaHideSilentPopup : When you are in silent mode, Java will not ask you if you want to make a sound in the application, it will not play the sound. 5 - colortbl : Changing Corby colors, colors and fonts of its backgrounds. ColorTBL.rsb and color.bin files should be in the Res folder 6 - SaveCallLog : Call logs are not deleted after changing or removing the SimChip. 7 - New Fonts : Allows installation of new fonts in Corby. They should be renamed correctly and located in the Res / Font folder. 8 - QuickOnOff - Removes the Music ee Samsung's Home screensaver on Mobile. It depends on the Power.ini file which should be placed in the Res folder 9 - Flash Player - Replaces part of Mobile Help with Interactive Flash player. Be able to play flash games. You should archive game.swf and the games whose name changes to 1.swf, 2.swf, etc... The whole Res folder 10 - VibOnCall - When the phone is connected it vibrates. I find that very annoying and that's why I leave it out. 11 - Google to Opera - Changes the launch of Google Maps, Opera Mini app from. It should be installed natively on the system [FFS - Java blocked] Opera Mini with the name. 12 - Mute Power Save - Removes the message that the battery is running low. 13 - Call Unlock LCD - Unlocks the screen when you are on a call. 14 - Wo HeadSet Radio -Listen to the radio without a foninho (headphones). 15 - Mega on Off: Help QuickOnOff, removing the Samsung and Sons screensaver. 16 - Check Sign Off: Remove the question: "This content is not signed. Do you want to continue?" On the installation of Java applications. 17 - CameraBGM: Removes the restriction on Radio and Music to listen while the camera is connected. It is disabled by default because the phone locks when opening the camera. 18 - KeyLockVib: Adds a small vibration when unlocking the phone. 19 - SkinColor: [REMOVED FROM EXTREME] acts together with colortbl to change the colors of the cells they used in the CorlorTBL.rsb file and allowed to choose between several colors in the menu to choose from Corby Themes. REMOVED BECAUSE IT ADDED TO OTHERS' PATCH THE MOBILE FOREVER AND THE RESET wouldn't care! 20 - Replace SWF2FFS: Changing default location of files: Gadget.swf, MainMenu.swf and maybe MyFiles.swf to /Res/Flash folder. (check if someone tells me my files if I should or should not enter this patch). 21 - Change Sound Patch: Changing most Corby sounds to ones that should be in /Res/Sound folder. 22 - AniNew Disable: Disable screen protection and Samsung SimChip loading screen. 23 - HideSThumbDB: No SThumb.db file shows most of the time created on Windows. Mysterious file ashuhaushauAUSHU. 24 - EasyAdminMenu: Changing passcode to Corby internal menu. Since *#3333#. 25 - New PhoneLock: Changing screen to unlock Corby. New screen should be in /Res/System folder. 26 - MP3 Auto Return - Remove the message: "Continue playing music". 27 - Increase Ring Remove - Removes the increase ringtone on the melody. It is set directly to the volume that was set in the active profile. 28 - Hold Key Unlock Off - Removes the ability to unlock the phone by holding down the side lock button. INCONSISTENT WITH KeyLockVib. 29 - Main Menu Back Key - Allows you to open the Menu by pressing the center button once towards Corby. 30 - Change BlueMusic - Replaces the Corby Bluetooth and also the icons and colors and the music player. Need files: Bluetooth.swf and MusicList.swf Res folder 31 - Key Music Control - Allows you to control songs by buttons: Off, Answer Button and Center Corby. INCONSISTENT WITH SmartHandsFree. 32 - Main Menu Preview - In theory this file allows you to preview the Corby menu, according to a renamed file Preview.swf, which should be located in the Res folder. I don't know how it works in practice, since there is no theme where the Russians come from. particular file 33 - SmartHandsFree - Possiblitava changing tracks with volume keys that are supposedly held down DISABLED BY DEFAULT. INCONSISTENT WITH Key Music Control. 34 - Default in SMS Phone - Guard releases cell only after SimChip memory is full. 35 - KJXDispatch.ini Change - Change the file that is installed in the KJXDispatch.ini Firmware [FactoryFS]. I see no use in this file. 36 - Fast Double SMS Send - Remove warning when sending more messages and SMS at the same time. 37 - FunctionLib - Needed for almost all remaining patches like the master patch. 38 - Java Hide BGM Popup - Allows you to listen to music or radio while playing Java applications. 39 - Talker - Adds an announcer for Corby numbers. Changes the pronunciation of the time, pronounces each number in the keyboard manual. Works with a single MP3 file containing all the spoken numbers. This file is called samples.mp3 and must be in the / Res / Sound folder. And for the pronunciation of the time you need hour.mp3 file in the same folder. PATCH, BECAUSE IT IS COMPLICATED, BECAUSE THE PORTUGUESE IN THE SECONDS OF PRONUNCIATION REQUIRED FOR THIS PATCH IS VERY DIFFICULT TO FIND AND PRONOUNCE THE PORTUGUESE LANGUAGE. INCOMPATIBILITY WITH Back Key Main Menu. 40 - Easy ScreenShot - Patch allows you to take Print Screen Corby, through it. Set in Settings / Display and Light / ScreenShot. To print, press the camera. Screenshots are located in the Pictures/Screenshots folder. It is simply not possible to OPEN the camera with your key. Taking pictures with the DA button. 41 - FastMenu: Allow TaskBox.swf to hold down the middle button on Corby. The taskbox should be located in /Res/System. 42 - Change AlarmPopup | Updated: Change the Alarm Clock display in Corby to a file named AlarmPopup.swf located in /Res/System. Enable the alarm to turn off by pressing the off button. 43 - Change TimerPopup | Updated: Change the Alarm Timer Corby display to a file named TimerPopup.swf located in /Res/System. Enable the alarm to turn off by pressing the off button. 44 - Change Calculator | Updated: Changed currency in the Corby to a file named Calculator.swf located in /Res/System. 45 - ImageViewer Change: Changed the Corby Image Viewer to a file called ImageViewer.swf located in /Res/System. I think this viewer is still very poor compared to the standard Corby. 46 - ExtRenameMod: Rename extensions by the Corby. 47 - Gadget FSCommand Add: Add more commands to Gadget.swf 48 - Java Auto Return: Remove the Java continue question. 49 - Time for Low Popup: This patch I couldn't find who created it for information! But I think the name is a patch that reduces the time for any Corby message or alarm. 50 - Video Size Large: This patch I also couldn't find who created it for information. But I also think the name is a patch that allows access to large video sizes. Source . Last edited by Ipho on 04/14/19 at 10:10:24 AM .
|
|
# 3
12/04/19, 17:41:46
|
||||
|
||||
|
Patches I recommend
Unlike the previous comment, the numbers I indicate will be the same ones you will have if you have followed my tutorial.
I will only put the numbers, but in your patch menu you will be able to see the names. Warning: not all patches are compatible with each other or recommended. If you do not want to complicate things too much, activate the ones I suggest below. 1-12 15-17. 20, 23 and 24. 14 is to activate menu.swf (custom menu), but all these menus do not work as smoothly as the factory one and are always in other languages (English, Russian or Portuguese). 25. 32-35 41, 42, 44 and 47 49-51 Patches that I do not recommend but that might interest you: 43. NewFonts (used to change the font according to the files you have in the res\font folder). The problem is that many unofficial fonts are not made for Spanish. So you may find that letters with accents appear larger and bolder, for example. Check your phone's Settings again, as new features will have appeared. For example, at the bottom of "Display & lighting" you will now find "ScreenShot". It is disabled, so you can enable it. To take screenshots, just hold down the camera key. The images will be saved in Images/Screenshots. By the way, unfortunately, every time you restart your phone you will have to set the wallpaper you had chosen again, as for some strange reason the change is not saved. Last edited by Ipho on 04/14/19 at 10:06:46 AM .
|
|
#4
12/04/19, 18:06:00
|
||||
|
||||
|
Detalles
Si ya habéis hecho todo lo anterior, ahora toca retocar el sistema para ponerlo al gusto de cada uno.
Primero: hay que ir Ajustes/Configuración/Settings y configurar todos los apartados. Os llevará unos pocos minutos. Segundo: con nuestro custom FW tenemos tres cosas ocultas en la pantalla de inicio: 1. Panel de notificaciones (deslizando el dedo desde el extremo superior hasta abajo). No sé si realmente muestra todas las notificaciones (SMS, llamadas, correos, etc.) o si solo está de adorno, pero ahí está por si os interesa. La fecha y las hora las muestra mal, también la pantalla de bloqueo. De momento, no sé cómo se arregla, ya que no es la hora que pusisteis en la aplicación de Ajustes. Para salir del panel de notificaciones no funciona ni la tecla central ni el botón de colgar, hay que pulsar la flecha que se ve arriba a la derecha. 2. Menú oculto del custom FW (Personalize Home). Se accede a él presionando en cualquier punto no ocupado en la pantalla de inicio. Para salir de cada apartado hay que presionar "Tap To Back" o "Personalize Home", los botones físicos no funcionan con la mayoría de menús custom. Tiene estas cuatro opciones: Shortcuts: accesos directos. Wallpapers: fondos de escritorio. Widgets: para añadir herramientas en alguna de las tres pantallas del teléfono (se accede a cada una moviendo el dedo hacia la izquierda o hacia la derecha). Las opciones que vienen de serie son Reloj, Música y el buscador de Google. Phone Setup: para hacer cinco cosas: reiniciar, activar/desactivar el modo avión, activar el modo silencio, ver un "easter egg" y activar el modo normal. El modo silencio y normal desactivan el modo avión. Para salir del "easter egg" y de Phone Setup hay que pulsar cualquier parte de la pantalla no asignada a ninguna opción. 3. Menú Rápido: es algo así como una especie de menú multitarea de los de hoy en día. Se puede acceder rápidamente a estas opciones: Teléfono (está traducido como "teclado") SMS Menú Contactos Internet (navegador) Juegos Anterior canción, pausa, siguiente canción Radio Música Última edición por Ipho Día 12/04/19 a las 18:25:06.
|
|
#5
12/04/19, 18:12:32
|
||||
|
||||
|
Aplicaciones
En este móvil se pueden instalar aplicaciones en formato JAR y, gracias al parche JavaOnMMC, también podemos instalarlas en la microSD (cosa muy positiva, ya que la memoria interna del teléfono es terriblemente escasa).
Aquí podéis conseguir muchas: https://es.java.mob.org/screensize/240x320/samsung (la mejor página para juegos, pero no tiene aplicaciones de otro tipo). Por cierto, para nuestro teléfono: 240x320 http://es.java-ware.net/download-app...g-corby/1/date http://es.phoneky.com/java-software/?v=3 (no parece muy de fiar, usadla solo si quieres encontrar alguna aplicación modificada o como última opción) http://samsung-s3650-corby.oms.apps.bemobi.com/es_es http://samsung-s3650-corby.oms.apps....hp?soft=search http://java.apps.opera.com/es_es/download_0 (mejor entrar desde el móvil, ya que desde el navegador muchas veces se redirige a la tienda de aplicaciones HTML5) Para aplicaciones, la mejor tienda es Opera; pero como habéis visto tiene algunos problemas. Y aquí el mayor problema de todos: solo descarga archivos JAD desde el ordenador, así que para completar la instalación hay que tener el Corby con acceso a Internet. Por lo tanto, os recomiendo lo siguiente en el caso de que os descarguéis las aplicaciones desde el móvil: Búsqueda por categorías: http://samsung-s3650-corby.oms.apps....categories.php Búsqueda de una aplicación en concreto: http://samsung-s3650-corby.oms.apps....hp?soft=search .......... Actualización: Al final, veo que la mejor tienda para aplicaciones es: http://es.java-ware.net/download-app...g-corby/1/date Descarga los JAR sin problemas, tiene buscador y organizadas todas las aplicaciones por fecha de carga, popularidad, clasificación y nombre. Para juegos la mejor es: https://es.java.mob.org/screensize/240x320/samsung Recordad que nuestra pantalla es de 240x320. Cread una carpeta en la microSD con todas las aplicaciones, la poca memoria interna de la que dispongáis dejadla libre. Última edición por Ipho Día 12/04/19 a las 21:13:08.
|
|
#6
12/04/19, 21:42:22
|
||||
|
||||
|
Cosas que no me gustan y que voy a ver si cambio:
Barra inferior. Pantalla de bloqueo. No voy a usar más MultiLoader, no vaya a ser que fastidie todo el progreso que hice desde la última vez que lo usé. Así que tengo que jugar con los archivos de la carpeta Res. Suelen ser archivos SWF los de las cosas que quiero cambiar y creo que se cargan con tal solo sustituirlos en Res y reiniciar. Ejemplos: Menú: Menu.swf Barra de inicio (inferior): Gadgets.swf Cambiar diseño del explorador de archivos: MyFiles.swf El parche que permite estos cambios de la carpeta Res es Change SWF, que ya habíamos activado previamente. Ejemplo de pantalla de bloqueo chula: .png)  Iconos iPhone del menú:  Mejor barra de inicio y panel de notificaciones: 
Última edición por Ipho Día 14/04/19 a las 08:51:20.
|
|
#7
12/04/19, 22:18:23
|
||||
|
||||
|
Códigos importantes (se insertan como si fueran números de teléfono:
*#5239870*# = Menú de Administrador. En este menú hay varios apartados y algunos de ellos piden dos tipos tipos de contraseña: Master Key y Operator Code. Estas contraseñas varían según el operador del teléfono (también el código para acceder al Menú de Administrador, por lo visto. Estos son los míos (me ha llevado un rato encontrarlos): *#7092463*# = Master Key (con esto accedemos al apartado Internals). Mucho que toquetear. *#27236*# = Operator Code (con esto accedemos al apartado Pre-configuration). Básicamente, lo que permite es reinstalar el firmware del operador (Vodafone en mi caso). .... JAVA SIN MEMORIA DISPONIBLE A veces obtendrás este mensaje mientras juegas a juegos java. PASOS PARA FIJAR- 1. vaya a llamar e ingrese * # 5239870 * # para acceder al menú de administración. 2. ir a lo interno 3.Introduzca la clave maestra * # 7092463 * # 4. ir a la configuración de almacenamiento 5. haga clic en actualizar Java DB AUMENTAR EL VOLUMEN PRINCIPAL MÓVIL Pasos- 1. vaya a llamar e ingrese * # 5239870 * # para acceder al menú de administración. 2. vaya a las partes internas 3. introduzca la tecla maestra * # 7092463 * # 4. vaya al modo de prueba 5. vaya al audio presionando 5 6. vaya a la configuración SPK presionando 3 7. vaya a SPK Wave / MP3 presionando 4 8 .go a SPK MP3 presionando 5 9.go a SPK MP3 Slop Gain[*] presionando 1 10. presione 6 [14] .... 11.eleccione el cuadro de texto e ingrese 511 12. presione OK dos veces 13. lo haría estar en blanco esperar 5 segundos, volverá a aparecer la pantalla con las opciones con [14] cambiado a 511 14.hacer, presionar el botón rojo para salir, reproducir una canción y ver Última edición por Ipho Día 16/04/19 a las 06:35:30.
|
|
#8
14/04/19, 10:30:10
|
||||
|
||||
|
Cambios que he hecho al final:
Cambios de tema (Gadget, Menu, MyFiles). El tema es Android Optimus, aunque menu.swf no lo activé en el menú de parches, ya que prefiero el menú de fábrica. De todas formas, el menu custom que me gustaba más era Android Jelly Bean 4.1. De pantalla de bloqueo me quedé locks for corby\1. También instalé un Amss_patch.bin creado con QuB a partir del apps_compressed.bin del FW oficial, pero no he notado cambios. Creí que conseguiría modificar el menú de parches para que se mostrara de la siguiente forma: 1) Menú de parches: administre parches desde el menú. 2) Información - Información sobre el teléfono. 3) Herramientas - Utilidades como dumper a través de UART 4) Reiniciar - Para reiniciar el teléfono Las opciones 2 y 3 no se muestran con el menú de parches que conseguimos en el tutorial que hice al principio. Aunque no son opciones importantes. También quería ver si con el nuevo Amss_patch.bin cambiaba el fondo de pantalla del menú de parches, pero tampoco. ¿Quizá es que todo esto dependa de del RC2 modificado? Probaré ahora a instalar nuevos parches compilados en un nuevo RC2 con QuB. Junto a mi Amss_patch.bin personal. Última edición por Ipho Día 14/04/19 a las 10:37:52.
|
|
#9
16/04/19, 04:10:25
|
||||
|
||||
|
Me dispongo a instalar mis propios RC2 (sin preactivación de los parches, ya que de no ser así se obtiene un bootloop) y Patch.bin (ambos creados con QuB). Pasos:
Extraer SIM y microSD. Desactivar todos los parches, guardar y reiniciar. Los dos únicos que no se pueden desactivar son Masterpatch y Loader. Cuando el sistema se inicie, borrar la carpeta res entera desde el propio teléfono. Tardará unos minutos, calculo que en mi caso ha tardado dos. No debería tardar más de cinco. Reiniciar. Activar modo Reproductor multimedia y guardar cambios Copiar nueva carpeta res (preparada para los parches de mi RC2) a la raíz de la memoria del teléfono, como siempre. Comprobamos desde el teléfono que la carpeta está bien. Activamos modo Samsung PC Studio y guardamos los cambios. Apagar e iniciar modo Download. Iniciamos MultiLoader como Administrador. Marco BRCM2133, Boot Change y Full Download. Inserto mi Patch.bin en Amms. Inserto mi RC2 en Rsrc2. Pulso Port Search hasta que esté en Ready. Compruebo que todo esté bien hecho antes de realizar la instalación, que todos los archivos sean los correctos y que estén marcadas todas las opciones correctas. Hay unos pequeños cuadros al lado de cada apartado (Amms y Rsrc2), hay que comprobar que están marcados con un tick. La instalación dura dos segundos. Se suele reiniciar el teléfono automáticamente y no se pierden datos ni configuraciones del sistema. En el caso de que no se reinicie, hay que extraer la batería e iniciar de nuevo. El menú de parches ahora está actualizado, ya que en este RC2 he puesto el MasterPatch 2.0 (junto a un nuevo Loader.bin que se debe poner en Default de QuB). Aunque siguen apareciéndome solo dos opciones al principio, en vez de cuatro (como comenté que había visto en algún hilo del foro ruso). En definitiva, ahora tengo 57 parches, el fondo azul más estético (que era el que estaba buscando) en el menú de parches (creo que gracias al nuevo Loader.bin) y el MasterPatch de 2012 (el otro era de 2010). También tengo un nuevo logo de inicio. Obtuve un bootloop por haber hecho al principio un RC2 con todos los parches preactivados, pero afortunadamente solo quedó en un pequeño susto que se solucionó quitando la batería y entrando de nuevo en Download para carga un RC2 sin parches preactivados (salvo MasterPatch). Última edición por Ipho Día 16/04/19 a las 06:24:51.
|
|
#10
16/04/19, 06:20:32
|
||||
|
||||
|
Nuevo orden de parches activados:
1. MasterPatch 2. BackKeyMainMenu 3. CallUnlockLcd 4. CameraBGM 6. ChangeAlarmPopup 7. ChangeBlueMusic 8. ChangeCalculator 9. ChangeImageViewer 10. Change_Sound_Patch_v1 11. ChangeTimerPopup 12. change gadget 14. change menu 15. change myfiles 16. CheckSignOff 17. ColorTbl 20. EasyScreenShot 23. FastMenu 24. FunctionLib 25. GadgetAddFsCommand 29. JavaAutoReturn 30. JavaHideBGMPopup 31. JavaHideSilentPopup 32. JavaLcdoff 33. java on mmc 35. KeyMusicControl 37. MainMenu_Preview 39. MP3AutoReturn 40. MutePowerSave 41. NewOnOff 42. NewPhoneLock 44. FlashPlayer 47. RadioWoHeadSet 50. SaveCallLog 52. SkinColor 54. SmsDefaultInPhone Fuente Última edición por Ipho Día 16/04/19 a las 06:23:08.
|
|
#11
16/04/19, 06:39:34
|
||||
|
||||
|
Orígenes
Ahora que ya he terminado este tutorial (que ni mucho menos creí que me fuera a llevar tanto tiempo) y casi casi la aventura con el trasteo de este teléfono antiguo, adjunto en el enlace de cómo empezó todo:
¿Cómo era modificar teléfonos de décadas pasadas? C++, Java, etc.
|
|
 Estás aquí
|
||||||
|
||||||


